What Should You Prepare Before Building A DIY Book Nook Scene?
Plan smarter before building your miniature shelf world.
Most people grab the materials, sit down, and then realise they've got no plan. The result? A half-finished shelf insert, dried glue everywhere, and a vague sense of defeat. Getting your preparation right before you touch a single piece of wood or LED strip makes the whole build faster, cleaner, and genuinely satisfying.
This article covers three essentials you need to sort before you start: your concept and design decisions, the right tools and materials, and the structural elements that hold everything together. Get these in place, and the actual build almost takes care of itself.

Planning Your Concept and Choosing the Right Starting Point
Your concept is the single decision that shapes everything else, from the size of your build to which adhesives you'll stock up on. If you're new to book nooks, detailed DIY book nook kits give you a pre-designed scene with cut components and instructions. That's far smarter than staring at a blank piece of MDF and hoping a rough idea carries you through.
Pick a Theme Before You Pick a Material
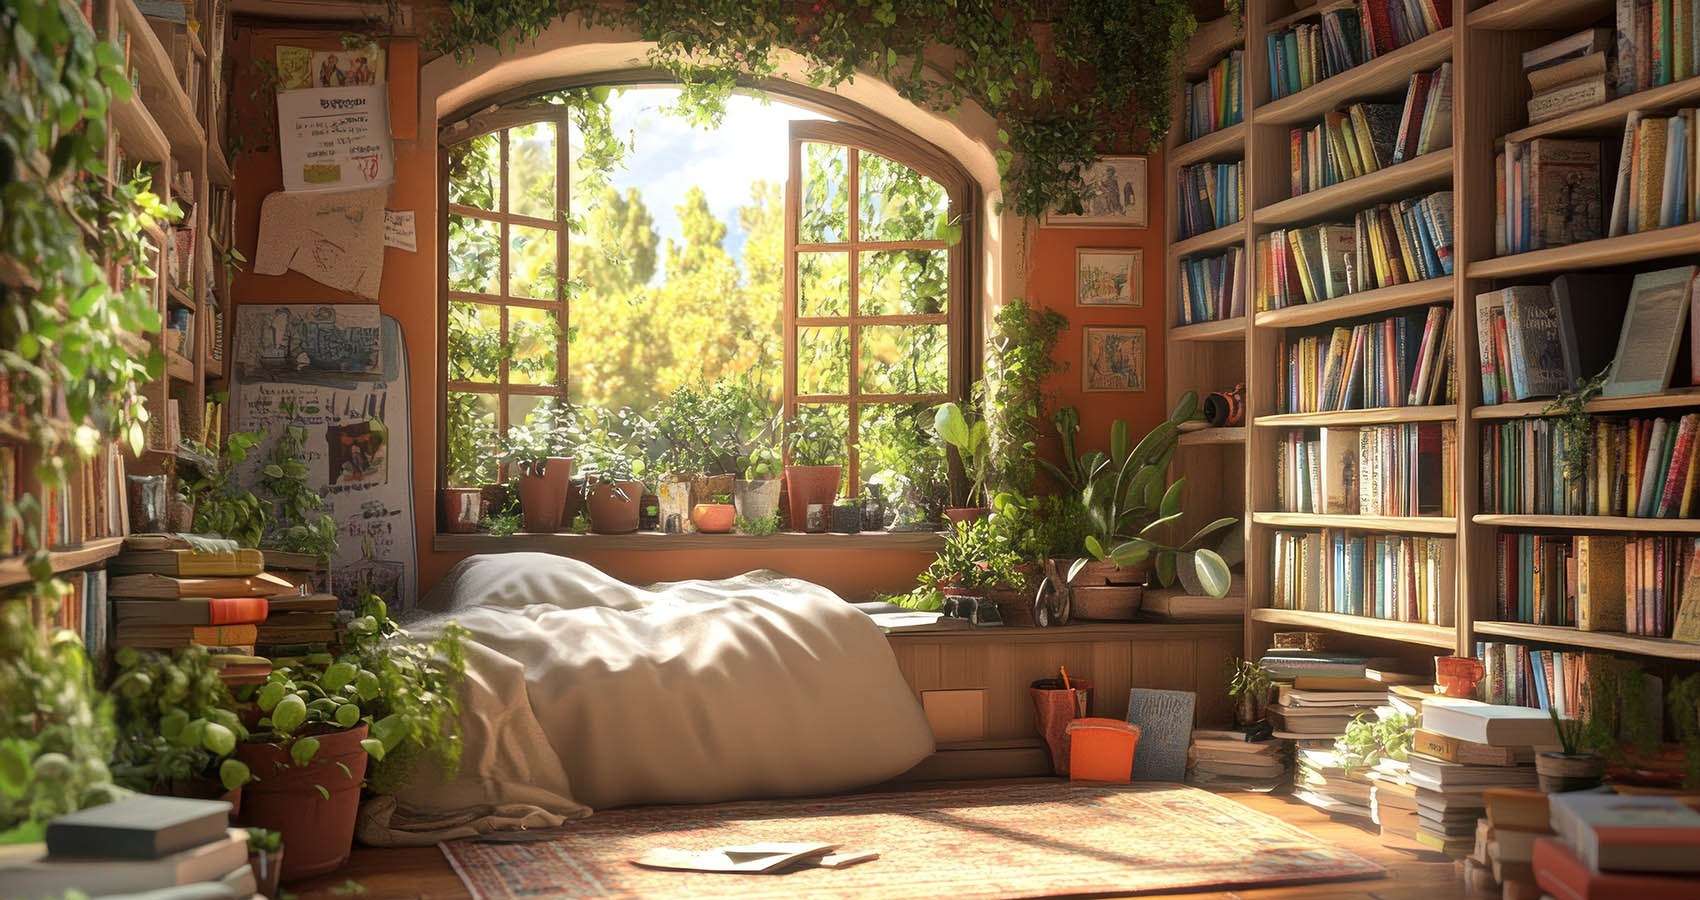
The theme dictates your colour palette, the textures, and the level of detail your scene needs. A dark forest scene calls for earthy tones, bark-effect paint, and possibly miniature moss. A lit bookshop interior needs cardstock, printed paper, and warm-toned LEDs. Choose your theme first, and you won't end up buying materials that don't belong anywhere in your scene.
Write down three words that capture the mood you're after. Dark and moody? Bright and whimsical? Those three words become your filter for every single purchase.
Measure Your Shelf Space First, Not Last
A book nook built without measurements almost always fits badly. Grab a tape measure and record the height, depth, and width of the gap where your nook will sit. Standard UK paperback shelves run around 25- 30 cm deep, but they vary. Your Nook box needs to sit flush or slightly recessed; the depth measurement especially deserves a second look.
Scribble those measurements on a sticky note and keep it near your build area. You'll refer to it constantly.
Sketch a Rough Scene Layout
And honestly, you don't need artistic skill for this. A five-minute pencil sketch showing where the background sits, where the lighting goes, and where focal props land, that saves real time later. Think in layers: background, mid-ground, foreground. Layered builds create the illusion of depth; that's what makes a book nook look so convincing from the front.
Tools, Materials, and What Actually Goes Wrong
Getting the right materials sorted before you build prevents the most common frustrations mid-project.
The Tool List You Actually Need
You won't need power tools for most book nooks. A utility knife, a metal ruler, a low-temperature glue gun, tweezers, and a small paintbrush cover the majority of builds; add a mini hand saw if you're cutting balsa or thin plywood. Here's the thing: tweezers are the most overlooked item. Placing tiny props with your fingers into a 25 cm deep box is practically impossible.
Keep everything in a single tray before you start. Hunt for a utility knife mid-glue, and that's how accidents happen.
Choosing the Right Adhesive for Each Layer
Not all glues work the same way on miniature builds. PVA glue suits paper, card, and fabric. A glue gun handles wood, foam, and heavier structural pieces. Superglue works on small resin or plastic props, but it bonds fast, so position carefully. The catch is using the wrong adhesive on the wrong material; your scene'll shift or fall apart once it's on the shelf.
Buy small quantities of all three. You'll use them all.
Lighting: Plan the Wiring Before You Build the Walls
LED fairy lights or copper wire LEDs are standard for book nooks, and both work well. Most builders add walls and backgrounds before thinking about where the wire exits. Decide early whether the wire exits through the back panel, the base, or the top; then cut or drill that exit point before you glue anything down.
Battery-powered LEDs are easiest for first-timers; they need no fixed power source. USB-powered strips give a cleaner finish if you don't mind running a wire out of sight along your shelf.

Structural Foundations That Hold the Scene Together
Before you build a DIY book nook scene, the structural box needs to be solid. Everything decorative sits on top of it, so any wobble in the frame shows up in the finished piece.
Choosing the Right Base Material
Balsa wood is light and easy to cut, but can warp over time, especially near windows. MDF is sturdier and takes paint well, though it's heavier. Foamboard works brilliantly for first builds: it's cheap, easy to cut, holds glue, and doesn't warp in a normal indoor environment. Most beginners get the best results with a foamboard box and MDF just for the base panel.
Assembling the Box Before Adding Any Detail
Build the outer box and let it fully dry before you attach backgrounds or props. Glue detail onto an unset frame, and everything shifts while it cures. Let the structural joints dry for at least two hours; check all four corners for squareness. Then start layering in your scene.
Test the Scene Before You Glue It Permanently
Do a dry run. Place every layer and prop loosely inside the box, add the lighting, and look at it from the front at shelf height. That's where you catch problems: a background that's too tall, a prop that blocks the light, a gap in the side wall. Fix those before anything goes in permanently. Five minutes of dry-testing saves an hour of unpicking dried glue.
Conclusion
Solid preparation separates a book nook you're proud of from one you shove at the back of a shelf. Sort your theme and measurements first; get the right adhesives and tools together before you start; build the structural box before you add any detail. Do those three things and you're already most of the way there.